
Whether you’re making a custom silver ring, repairing a broken gold chain, or assembling intricate metal parts into a cohesive whole, soldering is one of the most critical skills in jewelry making. But what exactly is solder? And why is choosing the right solder so important? In the world of metalworking, solder comes in many forms, strengths, and compositions, each designed for specific tasks and metals. For beginners and even experienced jewelers, understanding the different types of solder and when to use each is vital knowledge to ensure both functionality and beauty. In this guide, we’ll take a look at the various types of solder used in jewelry making. We’ll explore how to select, apply, and get the most out of each type of solder. Whether you’re a hobbyist or a professional, this soldering guide will help you take your craft to the next level.
What is Solder in Jewelry Making?
At its core, solder is a metal alloy that melts at a lower temperature than the metals it is used to join. When heated, solder flows into the seam between two metal surfaces, bonding them together as it cools and solidifies. In jewelry making, this process is called soldering, and it’s one of the fundamental skills for constructing everything from rings and chains to pendants and bezels.
Now that we understand what solder is, let’s dive into the most common solder grades and their applications in the jewelry making process.
The Three Main Grades of Solder
When working with precious metals like silver and gold, jewelers often use three main grades of solder: hard, medium, and easy. These grades refer to how high a temperature the solder requires to melt — not how physically hard the material is once solid. Understanding these temperature differences is crucial, especially when a piece involves multiple soldering steps. Choosing the right order helps prevent earlier joints from melting again.
1. Hard Solder
Hard solder has the highest melting point, typically around 750–790°C (1380–1450°F). It’s used for the first soldering steps in a project because it can withstand future heat applications without melting. Hard solder produces strong, clean joins, making it the go-to for structural connections in fine jewelry.
2. Medium Solder
Medium solder melts at a slightly lower temperature, usually around 705–720°C (1300–1328°F). It’s ideal for intermediate joins, where the first joints made with hard solder must remain intact. This makes it a perfect choice when building multi-part pieces in stages — such as assembling a bezel setting onto a ring shank.
3. Easy Solder
Easy solder melts at the lowest temperature of the three, approximately 670–700°C (1238–1292°F). This makes it ideal for final soldering steps, delicate repairs, or work on thin materials that might warp under higher heat. Easy solder flows quickly, minimizing the risk of damaging previous joints.
Using these three grades strategically allows jewelers to build complex pieces in layers, soldering parts without undoing previous work.
Types of Solder by Metal
Not all metals behave the same under heat — and neither does solder. The alloy composition, color, and melting temperature of solder must be carefully matched to the metal you’re working with. This ensures not only a strong bond, but also a seamless aesthetic finish. Let’s look at how solder differs across common jewelry metals:
1. Silver Solder
For jewelers working with silver — especially sterling or fine silver — silver solder is a staple. It’s available in the typical hard, medium, easy, and extra-easy grades, and designed to match the bright tone of silver as closely as possible. It melts cleanly and is relatively beginner-friendly, though sterling silver can develop firestain if overheated. With proper use of flux and heat control, silver solder allows for nearly invisible seams on rings, bezels, and chain links.
2. Gold Solder
Gold solder is a bit more nuanced. It comes in a wide range of karats — 10K, 14K, 18K, and sometimes 22K — as well as colors like yellow, white, and rose. Matching both the karat and the color of the base metal is essential for an invisible finish. A mismatch, even slight, will leave obvious lines after polishing. Gold solder tends to be more expensive, but it’s critical when working on high-end jewelry pieces where every detail counts.
3. Platinum Solder
Platinum requires its own category of solder due to its high melting point and unique working characteristics. Platinum solder typically contains platinum-group metals and melts at significantly higher temperatures — often over 1100°C. Because of this, it demands a specialized torch setup and excellent heat control. Platinum soldering is typically handled by experienced jewelers and requires a clean, contamination-free environment to achieve professional results.
4. Base Metal Solders (Copper, Brass, Bronze)
For those working with base metals like copper, brass, or bronze, soldering presents its own challenges. These metals oxidize quickly under heat, and most solder alloys don’t match their reddish or yellow tones very well. Even with careful technique, solder lines may remain visible after finishing. That said, specially formulated base-metal solders do exist and can be useful for costume jewelry or artistic mixed-metal pieces where perfect color blending is less critical.
Choosing solder that’s compatible with your metal ensures your joins are not only strong, but also visually harmonious. And once you’ve picked the right type, the form it comes in also plays a big role in how easy it is to apply — which we’ll explore in the next section.
Forms of Solder
Solder doesn’t just come in different grades and alloys — it also comes in several physical forms, each suited to different techniques and preferences in the studio.
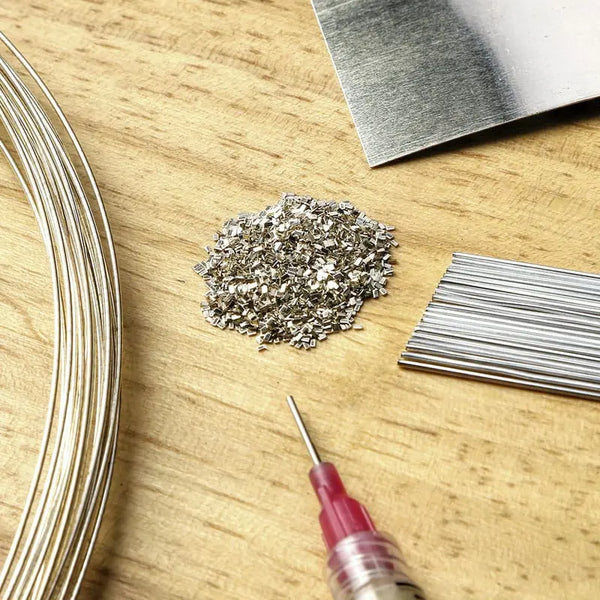
1. Wire Solder
One of the most common and versatile forms is wire solder. It’s exactly what it sounds like — a thin wire of solder that can be snipped into small pieces or shaped to follow curved joints. Many jewelers prefer wire because it’s easy to handle and control, especially when making custom-sized snippets on the spot. It’s a great choice for most general soldering tasks, whether you’re building a ring or adding jump rings to a chain.
2. Sheet solder
Sheet solder is another popular option, especially for those who prefer to cut precise, consistent shapes. A flat sheet of solder allows you to trim exactly the amount you need and is particularly helpful for projects where uniformity is important. It also tends to stay put better than round wire pieces during heating, which can be a real advantage when working on flat surfaces or complex layered designs.
3. Pallions
For jewelers looking for speed and convenience, pallions — tiny pre-cut squares or chips of solder — are a go-to solution. These are often snipped from sheet solder in advance and stored in labeled containers for easy access during production. Pallions are perfect for repetitive tasks like soldering multiple links or assembling findings, where consistent size and melt timing are important.
4. Paste Solder
Then there’s paste solder, which is a mixture of powdered solder and flux suspended in a binder, usually dispensed from a syringe. Paste solder is extremely handy for intricate or tight spaces where placing tiny pieces of solid solder would be difficult. Because it contains flux, it simplifies the process by combining two steps into one. It’s especially popular for small-scale work or delicate repairs.
5. Pre-fluxed Solder
Some jewelers use pre-fluxed solder, which combines solid solder with an integrated flux coating. This is particularly helpful for beginners or quick repairs, as it eliminates the need to apply flux separately. While it may not offer the same level of control as separate solder and flux, it’s a convenient solution for straightforward soldering jobs.
Each form of solder has its own strengths and best-use scenarios. Some jewelers even keep all types on hand so they can choose based on the project at hand.
How to Choosing the Right Solder
With so many options in terms of grades, alloys, and forms, choosing the right solder can feel overwhelming — especially when you’re mid-project and trying to make the perfect join. But if you understand a few key factors, the decision becomes much easier and more intuitive.
1. Base Metal Compatibility
The first and most important consideration is the type of metal you’re working with. Solder should be chemically compatible and visually similar to the base metal. For example, if you’re soldering sterling silver, you should use silver solder — preferably one that closely matches in color and melting behavior. For gold, it’s essential to match both karat and color. Using 14K yellow gold solder on an 18K rose gold piece will almost always leave a visible seam, no matter how clean the join.
2. Project Stage and Soldering Sequence
Most pieces are soldered in multiple steps, so it’s important to use solders in the correct sequence — starting with hard solder for early joins, followed by medium or easy solder for later ones. This prevents earlier soldered joints from re-melting when you apply heat to new areas. Planning your soldering order from the beginning saves time and reduces mistakes.
3. Joint Strength Requirements
You’ll also want to think about the strength of the joint. Structural parts of the piece — like ring bands, chain links, or prong settings — should be joined with higher-temperature solders like hard or medium. These provide greater durability under stress. For low-stress areas or decorative elements, easy solder may be sufficient.
4. Heat Sensitivity of the Workpiece
Another practical concern is heat sensitivity. If you’re working with delicate components, thin sheet metal, or stones already set in place (in rare cases), you’ll need a solder that flows at a lower temperature to avoid damaging the surrounding material. In such cases, easy or extra-easy solder can help you work more safely.
8 Tips for Using Solder Effectively
Mastering soldering isn’t just about having the right materials — it’s also about using them correctly. The following tips will help you get cleaner joins.
1. Always Clean Your Metal First
Solder won’t flow on dirty or oxidized surfaces. Use fine sandpaper, emery sticks, or a file to clean the areas to be joined before applying flux. For best results, clean both sides of the seam — oxidation, oil, and even fingerprints can interfere with flow.
2. Apply Flux Generously
Flux is essential for preventing oxidation and helping solder flow evenly. Use a brush or applicator to coat the joint area before heating. For silver or copper, a borax-based flux works well. Reapply if the flux dries out before soldering begins.
3. Control Your Heat
Use the right flame size and temperature for the job. A flame that’s too small won’t heat the metal evenly, while a flame that’s too hot may melt or overheat the piece. Move the torch in smooth, circular motions to bring the entire area up to temperature gradually.
4. Watch the Solder, Not the Flame
Once the flux turns glassy and the metal reaches soldering temperature, keep your eyes on the solder. It will flash and flow when it melts — that’s your moment. Remove heat as soon as the solder flows fully through the seam to avoid overheating or damaging earlier joints.
5. Use Gravity and Capillary Action
Position your piece so the solder is drawn into the seam by capillary action. A small gap — not too tight or too wide — helps solder flow cleanly. You can even place solder on the opposite side of the seam and let it draw through the joint for an invisible finish.
6. Quench, Pickle, and Rinse
After soldering, quench your piece in water, then place it in a pickle solution (usually warm, diluted acid) to remove flux residue and oxidation. Rinse thoroughly after pickling to neutralize any acid left on the metal.
7. Keep Solder Small and Precise
Use only the amount of solder needed — too much creates blobs, while too little may leave gaps. Cut tiny pallions or snippets in advance, or use a small bead of paste solder for delicate joints. Clean work looks more professional and reduces polishing time later.
8. Practice with Scrap Metal
If you’re new to soldering or using a new type of solder, test on scrap metal first. This helps you understand how that particular solder behaves under heat, how quickly it flows, and how well it blends with the metal.
Conclusion
Soldering may be one of the most technical aspects of jewelry making, but it’s also one of the most empowering. The ability to join metal cleanly and securely opens the door to more complex designs, stronger constructions, and a truly professional finish. Understanding the different types of solder — from hard to easy, from silver to gold, and from wire to paste — gives you the flexibility to build and repair with precision.
Bonus: Soldering Tools Checklist
- Torch
- Soldering Surface
- Flux
- Soldering Tweezers and Picks
- Third Hand Tool or Clamp
- Quench Cup
- Pickle Pot
- Lighting and Magnification
- Snips or Flush Cutters
Your mode of explaining everything in this piece of writing is really
nice, every one be able to without difficulty understand it, Thanks a
lot.