If you’re new to jewelry soldering or looking for a cleaner, more efficient way to join small metal components, solder paste might just become your new favorite tool. It’s especially handy for delicate designs and hard-to-reach joints. In this step-by-step guide, we’ll walk you through everything you need to know to start using solder paste with confidence.
What Is Solder Paste?
Unlike traditional wire or sheet solder, solder paste combines tiny solder particles with flux in a creamy, easy-to-apply form. No need to juggle separate flux or struggle with fiddly bits of wire. Solder paste is easy to control. You can apply it exactly where you need it, which is especially helpful when working with small or intricate pieces. That’s why so many jewelers both beginners and pros, reach for solder paste when working on silver soldering projects like earrings, jump rings, or prong settings.
There are different types of jewelry soldering paste available, including hard, medium, and easy grades, just like with traditional solder. These determine the melting temperature, which comes in handy if you’re doing multiple soldering steps on the same piece.
And if you’re working with tiny joints or doing detailed work, you can even load your solder paste into a syringe for even more precision but we’ll get to that later.
Tools and Materials You’ll Need
Before you start soldering with paste, it’s important to have the right tools on your bench. Here are some of the tools and materials you will need:
l Solder Paste
l Torch
l Soldering Surface
l Tweezers and Pick
l Solder Paste Syringe
l Pickle Solution
Preparing Your Jewelry Piece
Before you bring out the torch, good preparation is key to a clean and successful solder joint. Solder paste may simplify the soldering process, but it still needs a properly prepped surface to work its magic.
Cleaning
One of the most important (and most overlooked) steps in jewelry soldering is surface prep. Your metal must be free of oil, dirt, fingerprints, or any kind of oxidation. Even a tiny trace of grime can prevent the solder from flowing and bonding properly. If there’s any tarnish or oxide layer, give it a light scrub with fine steel wool or a polishing pad. The cleaner and shinier the surface, the better your solder will flow.
Fit Matters
Solder is not a gap filler—it’s a bonding agent. That means the two pieces you want to join should fit snugly together. The tighter the fit, the cleaner and stronger the joint.
Take time to align the parts exactly as you want them. For example, if you’re soldering a jump ring or a bezel setting, close the gap as much as possible before applying paste.
Position Your Work Securely
Once your pieces are clean and properly aligned, place them on your soldering board or firebrick. Make sure they’re stable and won’t shift when heat is applied. You can use third-hand tweezers, binding wire, or even fire-safe clay to hold everything in place.
Applying the Solder Paste
Using too much paste can cause messy overflow or lumps after heating, while too little might result in a weak connection. A tiny dab, about the size of a grain of rice, is usually enough for small pieces. For larger joins, you can increase the amount proportionally, but always err on the side of caution.
You can use simple tools like a toothpick, a fine needle, or a small brush to pick up and spread solder paste onto the joint. This method works great for beginner-friendly projects or bigger areas where precision is less critical.
Dip your tool lightly into the solder paste, then carefully place it along the seam. Try to keep the layer thin and even for the best flow during heating.
Using a Solder Paste Syringe
For detailed or tiny joints, a solder paste syringe is a fantastic helper. It lets you squeeze out the exact amount of paste directly where you need it, with much better control than a toothpick.
To use it, attach a fine needle tip to the syringe, then gently press to deposit a small dot or line of paste onto the seam. Be sure not to overload the joint, small, precise amounts work best.
Keep the syringe tip clean and wipe off any excess paste regularly to avoid clogs and uneven dispensing.
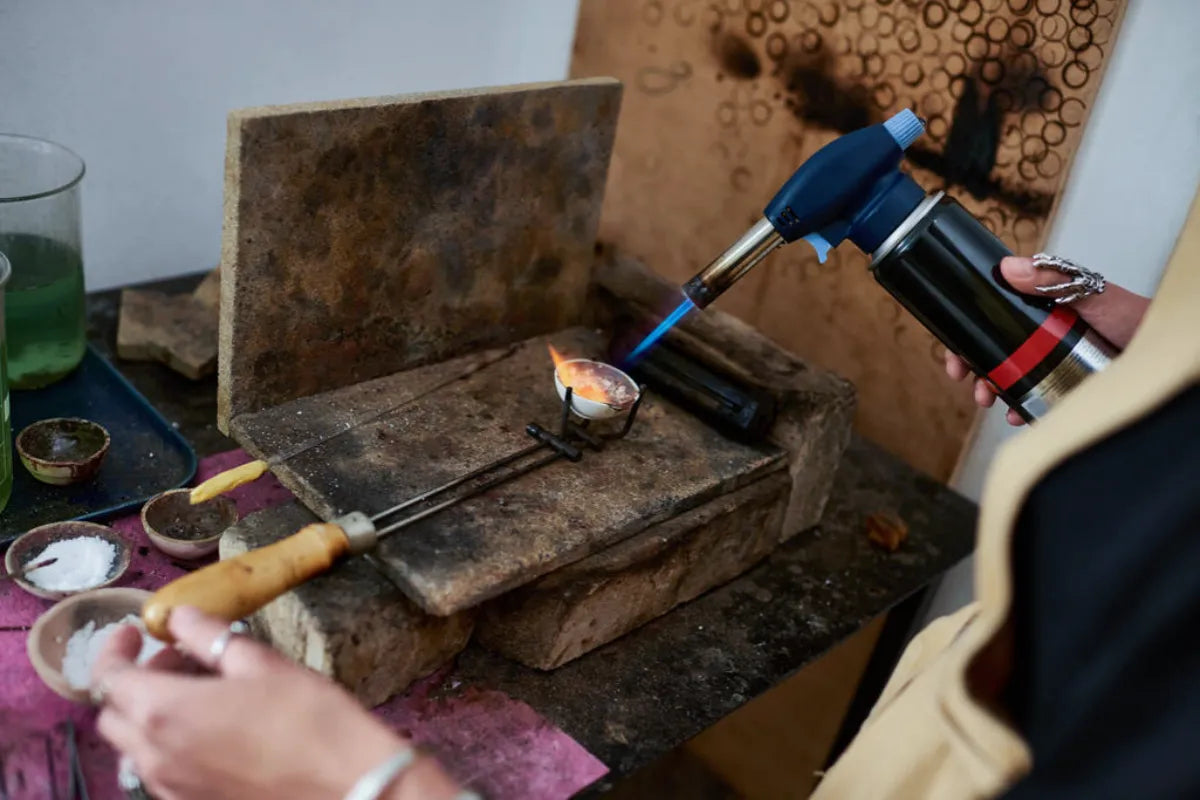
Heating the Piece
The next step is to fire up your soldering gun and solder your jewelry! Don’t worry, with solder paste, the soldering process will be much easier. Once you apply the solder paste correctly, the heat will bond everything together.
One of the biggest mistakes beginners make is pointing the flame directly at the solder paste. But here’s the trick: you’re not trying to melt the paste with your torch, you’re trying to heat the metal.
Aim to heat the entire piece evenly. The metal needs to reach the right temperature (usually around 1200–1450°F or 650–790°C depending on the solder grade), and once it does, the solder paste will flow toward the heat, bonding the components perfectly.
Start by moving the flame gently around the piece, warming the whole area. Then, gradually concentrate on the joint area until the solder flows.
As you heat the metal, the solder paste will go through a few stages:
1. It bubbles
2. It turns glassy
3. It flashes and flows
Once that shiny flash happens, stop heating! Overheating can burn the solder or melt your piece—especially delicate items like prong settings or thin wires.
Once the solder has flowed and the flame is off, let your piece cool before moving on to cleaning and finishing. You’ve just completed one of the most crucial steps in soldering jewelry with paste!
Pickling
Soldering causes a layer of oxidation to form on the metal, and even though solder paste includes flux, you’ll still notice some discoloration. That’s where pickle comes in.
Place your piece in a warm pickle solution using plastic or copper tweezers. Let it soak for 5–15 minutes, depending on how dark the oxidation is. Rinse thoroughly with clean water afterward.
Once you are done with the acid wash, you can start polishing and beautifying your jewelry.