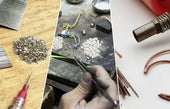
Sawing & Piercing Metal for Jewelry: A Complete Beginner’s Guide
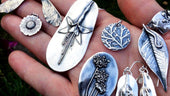
Have you ever admired a beautifully crafted metal pendant with intricate shapes or delicate cut-outs and wondered—how do they make that by hand? The secret lies in two essential techniques every jewelry maker should master: sawing and piercing. Sawing allows you to shape sheet metal into custom forms—hearts, stars, letters, At first, using a jeweler’s saw might seem intimidating. The blades look fragile, and breaking one can feel inevitable. But here’s the good news: it’s easier than i once you know the basics. In this guide we’ll help you confidently saw and perforate metal like a pro.
Tools & Materials You’ll Need
Before you start sawing and piercing metal, it’s important to have the right tools and materials at hand. Having everything organized will make your work smoother and more enjoyable. Here’s a simple checklist of what you’ll need:
Jeweler’s Saw Frame
Saw Blades
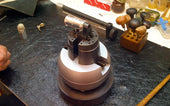
Bench Pin (or V-Board)
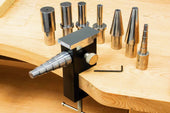
Drill and Drill Bits
Center Punch
Files and Sandpaper
Lubricant (Beeswax or Saw Blade Wax)
Metal Sheets
Safety Glasses
Dust Mask
Choosing the Right Saw Blade
Selecting the correct saw blade is one of the most important steps to achieve clean cuts and avoid frequent blade breakage. Saw blades are tiny and come in different sizes, called blade numbers or “grades,” which indicate how fine or coarse the blade is.
Understanding Saw Blade Sizes
Saw blades are numbered using a system where:
Lower numbers (e.g., 1, 2, 3) mean thicker blades with fewer teeth per inch (TPI). These are coarser blades.
Higher numbers with zeros (e.g., 2/0, 3/0, 4/0) mean thinner blades with more teeth per inch, used for fine, delicate work.
Matching Saw Blades to Metal Thickness
| Metal Thickness (mm) | Recommended Saw Blade Size | Typical Use |
|---|---|---|
| 0.3 – 0.5 | 3/0 – 4/0 | Very fine, detailed cutting |
| 0.5 – 0.8 | 2/0 – 3/0 | Most common for general cutting |
| 0.8 – 1.0 | 1/0 – 2/0 | Thicker metals, simple shapes |
| 1.0 and above | 1 or 2 | Very thick metal, rough cuts |
Tip: The blade should be fine enough that at least 3 teeth are always in contact with the metal for smooth cutting. Using a blade that’s too coarse on thin metal will cause the blade to catch and break.
Blade Material, Quality, and Practical Advice for Beginners
Most jeweler’s saw blades are made from high-carbon steel, with some premium options featuring special coatings that increase strength and reduce wear. Investing in quality blades from reputable brands like Vallorbe or Pike is worthwhile, as cheaper blades tend to break easily and dull quickly, which can lead to frustration—especially when you're just starting out.
For beginners, it’s best to start with a 2/0 or 3/0 blade when working with standard 0.6–0.8 mm copper or brass sheets. Always keep spare blades on hand because breakage is common during the learning process. Remember to replace blades as soon as they become dull or bent, since worn blades negatively impact cutting precision and increase the chance of snapping mid-cut.
Step-by-Step Sawing and Piercing Process
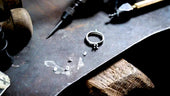
Start by preparing your workspace. Make sure your bench pin is securely clamped to a table or workbench and sits at a comfortable height—ideally around chest level. Arrange your tools so they’re easy to reach, ensure the lighting is bright and clear, and always wear safety glasses to protect your eyes from tiny metal particles.
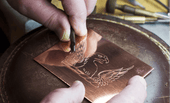
Next, mark your design onto the metal sheet. You can either use a fine-tip permanent marker or a scribe to draw directly on the metal, or glue a printed paper pattern to the surface. Make sure the design is clean, bold, and stable, especially if you’re cutting detailed shapes or interior sections that will require piercing.
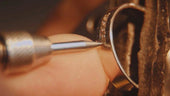
If your design includes interior cutouts, it’s time to drill a starter hole. Use a center punch to create a small dent where the drill bit should go—this prevents slipping. Then, using a handheld or rotary drill with a fine bit (around 0.7 to 0.8 mm), drill straight through the metal at that point. You’ll use this hole to thread your saw blade into enclosed areas.
After drilling, insert the saw blade through the hole and reattach it to your saw frame, making sure the teeth point downward and forward (away from the handle). Apply tension to the frame so the blade is taut—it should make a clear “ping” sound when plucked. This tension is key to clean, precise cutting.
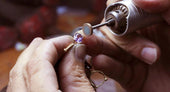
Once your saw is ready, begin sawing. Hold the saw vertically and use long, smooth strokes, allowing the blade to move naturally. Avoid pushing too hard—the saw should glide through the metal under light pressure. Keep your wrist relaxed and let your entire arm do the work to maintain control and reduce fatigue.
As you follow your design lines, rotate the metal slowly with your non-dominant hand to navigate curves or corners. For sharper turns, it helps to saw in place while gently pivoting the metal until you're aligned with the new direction. Keep your movements steady and patient—the more you force the saw, the more likely it is to snap.
Once your outline or interior shape is cut, remove the saw blade from the frame to free the metal piece. You may need to repeat the drilling and piercing steps multiple times if your design includes several interior cutouts.
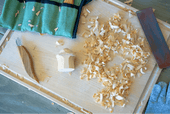
Finally, clean up the edges using a fine file or sandpaper. Smooth out any burrs left by the blade or drill and polish the surface if needed. This step not only improves the look of your piece but also ensures it's safe to wear or handle.

Practice Projects for Beginners
Now that you know the basics of sawing and piercing metal, it’s time to put your skills into practice. The best way to build confidence and control is to start with simple shapes and gradually increase complexity. Below are three beginner-friendly projects designed to help you master straight lines, curves
1. Simple Pendant Shapes
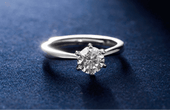
Start with a classic shape like a heart, star, or leaf—something with both curves and points. Draw your design directly on the metal or glue a printed template onto the surface. Use a 2/0 or 3/0 saw blade with 0.6–0.8 mm copper or brass sheet. Focus on staying on the line and making smooth turns. After cutting, file the edges and attach a jump ring to turn it into a pendant.
2. Initial Letter Cut-Out
Choose a bold capital letter (like A, M, or S) and saw it out of a small rectangle of metal. This helps you practice both exterior sawing and interior piercing, especially if the letter has enclosed areas (like A or B). You’ll need to drill starter holes for those. Once cut, smooth all edges and polish the surface. It makes a great personalized charm.
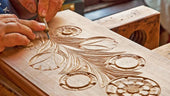
3. Decorative Window or Lattice Pattern
For a more advanced challenge, draw a geometric or floral “window” design that includes both outer and inner shapes. Drill holes inside each section you want to pierce and thread your saw blade through. This project will teach you how to work methodically through multiple interior cuts, reposition your blade, and maintain control over finer details.

Learning how to saw and pierce metal is a foundational skill that opens the door to limitless creative expression in jewelry making. While the first few cuts may feel awkward, every broken blade and imperfect curve is a step forward in building confidence and control.
By understanding the right tools, choosing the proper saw blades, practicing your technique, and working through beginner-friendly projects, you’re not just learning how to cut metal—you’re training your eye, hand, and imagination to work together.
Take your time, be patient with yourself, and don’t forget to enjoy the process. With practice, you’ll soon be creating pieces that are not only precise but deeply personal.
You May Also Like
-

New Year, New Carving Journey: Practical Advice for Beginners in 2026
Starting to carve for the first time is both exciting and...
-

Easy Engraving Tutorial: DIY Gift Ideas for the New Year
Ready to welcome the new year – 2026? A new year, a new l...
-
Why are more and more people carving at home?
In recent years, the term "home carving" has frequently a...
-

9 Common Types of Chains in Jewelry
When it comes to jewelry design, chains are often the uns...
-

Wooden Snowflakes: Decorate Your Christmas with Carving
Christmas is the warmest and most romantic time of the ye...
-

Halloween Carving Fun: Create Unique Holiday Gifts withengraving Tools
Are you ready, family? Halloween is just a few days away....
-
Why Jewelers Are Switching to Argentium Silver
For hundreds of years, sterling silver has been the stand...
-
What is a Jewelry Mandrel?
If you’re starting out in jewelry making, you've probably...
-

How to Use Solder Paste for Jewelry Soldering?
If you’re new to jewelry soldering or looking for a clean...
-

Top 10 Affordable Jewelry Gemstones for When You’re on a Budget
As a jewelry designer or DIY enthusiast, you know that in...
-
Everything You Need to Know About Black Spinel
Black spinel is quietly emerging as a modern classic amon...
-
Ultrasonic vs. Steam Jewelry Cleaner: Which is Better?
Even the most dazzling jewelry will lose its luster over ...
-

How to Carve a Simple Customized Bracelet
An easy custom bracelet is not just a piece of jewelry, i...
-
What Kinds of Solder are Used in Jewelry Making?
Whether you're making a custom silver ring, repairing a b...
-
Rolling Mill Basics: A Starter Guide
Whether you are a novice in jewelry making or a professio...
-
How Vacuum Casting Enhances Precision in Jewelry Manufacturing
When it comes to fine jewelry, precision is an absolute m...
-
How Different Carving Tools Should Be Strength Trained
When you are ready to carve, having the right set of carv...
-

Carving Tools That Should Be On Your Workbench
Ever seen what a carver's workbench looks like, most of t...
-
How to Make Beautiful Metal Prints
Metal printmaking is a special kind of painting art that ...
-
Realizing Unique Designs: Etching and Jewelry Engraving
When people start experimenting with engraving, they want...
-
The New Favorite of Handmade Wood Carving Industry - Pneumatic Engraving Machine
With the advancement of modern science and technology, tr...
-
Metal Engraving Techniques That Beautify Jewelry
Just as one is always willing to be drawn to something mo...
-
How to Make a Gemstone Ring?
Discover how gemstone rings are made and experience the u...
-
How to practice carving flowers technique in wood carving
Whether it is the complicated and delicate flower cluster...
-
What Tools Do You Need to Be a Silversmith?
This is a beginner's guide to silversmithing. Many people...
-
How Do Beginners Make a Simple Silver Ring?
Making a silver ring for your lover is a very romantic th...
-

What Kind of Microscope Do Jewelers Use?
Microscopes are called the third eye of jewelers. Accordi...
-

From Hobbyist to Pro Artisan: Your Tool Upgrade Roadmap
You've carved 50 wooden spoons, sold your first custom si...
-
How To Choose a Engraving Vise?
Engraving vises are a type of clamping tool that engraver...
-
10 Essential Woodcarving Techniques for Beginners
Woodcarving is an interesting and creative art. It is not...
-

10 Tips To Teach You How To Solder Jewelry
Are you worried about the soldering technique for making ...
-
A Complete Guide to Prong Settings
Setting is a common technique in jewelry making, and claw...
-
A Complete Guide To DIY Jewelry Making
DIY jewelry making is a very interesting but not easy thi...
-
Beginner's Guide to Hand-Engraving Metal: Tools, Tips, and Tricks
Hand engraving metal is like stepping into an art form th...
-

What Are The Advantages Of Pneumatic Engraving Compared To Push Engraving?
In the engraving process, pneumatic engraving is an indis...
-

Four Practical Ways to Engrave Metal
Metal carving is the carving of a design or pattern into ...
-

Do You Know How to Engrave Tungsten Rings?
In recent years, tungsten material will be stronger and m...
-
How Do You Re-Engrave Old Jewelry?
Jewelry has a permanent beauty and unique value, and many...
-
Pneumatic Engraving Machine Vs Electric Engraving Machines
As the industrial revolution took place, machines changed...
-
The Joy of Carving Wood
Wood carving is not only a handcrafted art with a long hi...
-
How to Buy High Quality Metal Engraving Tools?
It is said that metal engraving is an extremely testing c...
-

A New Engraving Experience for You with the AT Series Motors!
We have exciting news to share with you! The AT Series mo...
-
How to Choose a Mill for Jewelry Making?
In the process of jewelry making, a jewelry mill is a ver...
-
How to Choose and Use Jump Rings?
If you are a jeweler then you are no stranger to the term...
-
Teach You How to Pick a Jewelry Engraving Machine
Jewelry engraving machine is an indispensable tool for th...
-

How Do You Cast Jewelry?
Jewelry casting is a common way of casting jewelry. In fa...
-
A Comprehensive Guide to Jewelry Engraving
Jewelry will be preferred by many people as a gift, but h...
-
Tips for Using Engraving Tools
If you are a beginner who is just getting into carving, a...
-

Katway to Participate in Hong Kong Jewelry Show 2024
In recent years, Katway's brand strength has been improvi...


