If you’ve ever looked at a beautifully engraved ring or pendant and thought, “I want to try that,” you’re not alone. Jewelry engraving has this quiet, satisfying appeal—it’s detailed, hands-on, and incredibly rewarding once you get the hang of it.
But when you’re just starting out, one question comes up right away: what tools do you actually need?
The good news is, you don’t need a full professional studio on day one. What you do need is the right combination of basic hand tools and a few key machines that make the process smoother and more precise.
Let’s break it down in a way that actually makes sense for beginners.
Start with the Basics: Hand Tools You’ll Actually Use
Before getting into machines, it’s important to understand the core hand tools. These are what you’ll use to build your foundation and develop control.
Engraving tools (gravors) are the most essential. These are used to cut lines into metal surfaces, and they come in different shapes depending on the kind of detail you want to create. As a beginner, you don’t need a huge variety—just a few well-shaped tools are enough to get started.
Pliers are another must-have. You’ll use them for holding, bending, and adjusting small pieces. Look for a basic set that includes flat-nose and round-nose pliers.
You’ll also want a small hammer and chasing tools if you plan to experiment with texture or light shaping.
At this stage, it’s less about having everything and more about learning how each tool feels in your hand.
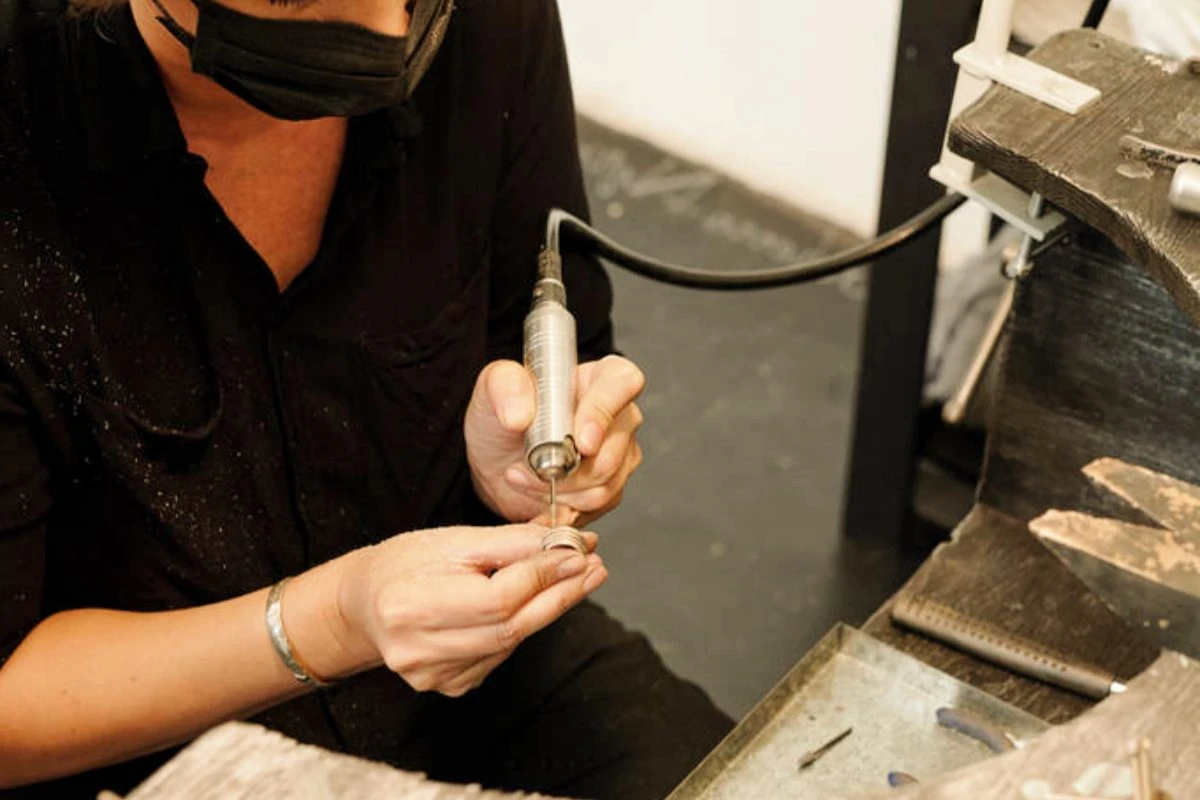
A Game-Changer for Beginners: Pneumatic Engravers
Once you’ve practiced with hand tools, you’ll quickly realize something—manual engraving takes time, and it can be physically demanding.
That’s where a pneumatic engraver comes in.
Instead of relying entirely on hand pressure, a pneumatic engraver uses controlled air pulses to assist your cuts. This gives you:
- More consistent lines
- Less hand fatigue
- Better control, especially for fine details
If you’re serious about improving your engraving, this is one of the best upgrades you can make early on.
On the Katway site, the Pneumatic Engraver HH-R01 is a solid option for beginners. It’s designed to be easy to handle while still giving you enough power for detailed work. The control feels smooth, which is especially helpful when you’re still building confidence.
A lot of beginners hesitate to move into powered tools, but honestly, this is the one machine that can speed up your learning curve significantly.
Shaping Metal: Why You Might Need a Rolling Mill
Before you even start engraving, you’ll often need to prepare your metal.
That’s where a rolling mill comes in.
A rolling mill is used to flatten or shape metal sheets and wires. For example, if you’re working with silver or copper, you might need to:
- Adjust thickness
- Create a smoother surface
- Prepare the material for engraving
For beginners, this might not feel essential right away—but once you start working on your own pieces instead of pre-made blanks, it becomes incredibly useful.
Think of it as part of your prep stage. Good engraving starts with well-prepared material.
Stability Matters: Don’t Skip the Engraving Block
One of the most overlooked tools for beginners is something simple—but critical: a way to hold your work steady.
Trying to engrave while your piece moves around is frustrating, and it usually leads to uneven lines.
That’s why an engraving block (ball vise) is so important.
It holds your jewelry securely while allowing you to rotate it smoothly as you work. This makes a huge difference in:
- Line accuracy
- Comfort
- Overall control
A good example is the Engraving Block HH-A04B from Katway. It has a solid, stable base and smooth rotation, which helps you keep consistent angles while engraving.
Honestly, once you use a proper engraving block, you won’t want to go back.
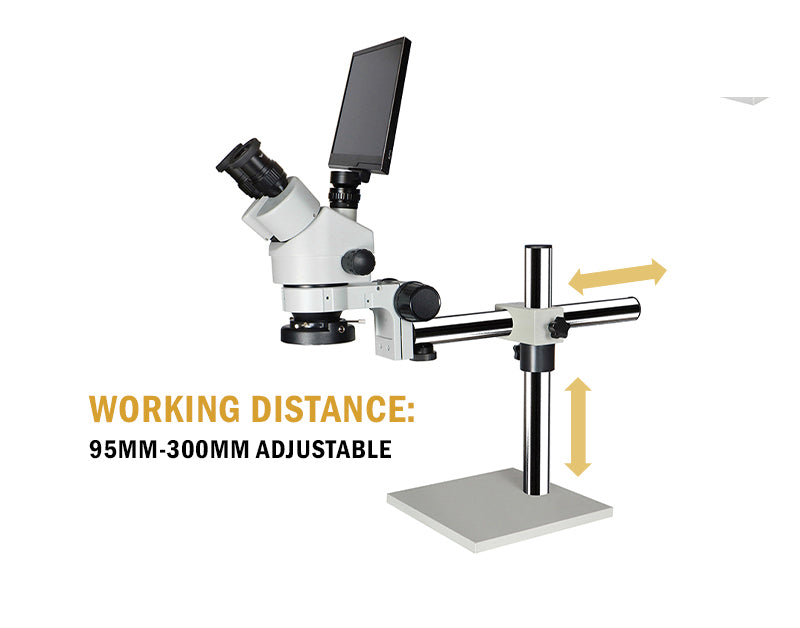
Want More Precision? Consider a Stereo Microscope
As your skills improve, you’ll probably start working on finer details. That’s when your eyes alone might not be enough.
A stereo microscope helps you see your work clearly at a magnified level, which is especially useful for:
- Fine line engraving
- Stone setting
- Detailed textures
This isn’t something you must have on day one. But if you’re planning to take engraving seriously, it’s a worthwhile upgrade.
It also reduces eye strain, which becomes a real issue during longer sessions.
Build Your Setup Step by Step
One mistake beginners often make is trying to buy everything at once.
You don’t need to do that.
A smarter approach is to build your setup in stages:
Stage 1:
- Basic engraving tools
- Pliers
- Simple workspace
Stage 2:
- Pneumatic engraver
- Engraving block
Stage 3:
- Rolling mill
- Microscope
This way, you’re investing based on your actual progress—not just guessing what you might need.
Pay attention to your specific carving needs
Jewelry engraving is one of those skills that rewards patience. The tools matter, but what matters more is how you use them over time.
Start simple. Get comfortable. Then gradually upgrade your setup as your skills grow.
If you’re looking for beginner-friendly tools that are reliable and easy to use, Katway offers a solid range—from pneumatic engravers to engraving blocks—that can help you build your setup with confidence.
At the end of the day, the goal isn’t to have every tool—it’s to have the right ones that help you enjoy the process and keep improving.
Thanks for sharing this! By the way, I found Nano Banana at https://nanobanana2.love/ to be a fantastic resource for AI tools. Worth a look!