How to Set a Faceted Stone in a Tube?
Step 1:
To create the base, refer to steps 1-3 of my blog post.
Step 2:
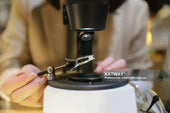
Slice a section of tubing; the provided dimensions are ideal for a 3mm stone. For stones of different sizes, ensure the inner diameter is marginally smaller than the stone and the outer diameter is slightly larger, providing sufficient metal to secure the stone during setting. The length of the cut tube should exceed the height of the stone, so measure it using your calipers. Position the stone flush with the edge of the calipers and tighten the jaws. Keep in mind, during the setting process, you'll be carving into the metal, so allow for a few extra millimeters. You have the option to set the stone at any height you desire or even arrange multiple stones at varied elevations. You can employ the calipers to mark the tube, serving as a reference for cutting. Utilizing a tube cutter can simplify the process since it secures the tube and provides a guide, although it's not strictly necessary.
Step 3:
Step 4:
Step 5:
Step 6:
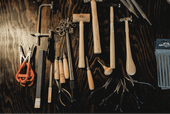
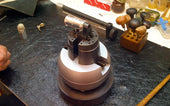
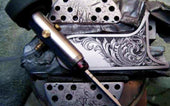
Secure your stone – the size of the setting burr should correspond to the dimensions of the stone. Apply a small amount of 3-in-1 oil to it, and insert it vertically into the tube, ensuring the burr remains as upright as possible to create an even seat. Rotate the pin vice and initiate the process of removing metal from the tube. Avoid applying excessive pressure, as this could cause the burr to become stuck, but don't be too gentle either, as it will take longer. You'll begin to notice small metal shavings being removed; regularly clear them away, and employ a dental brush to maintain cleanliness inside the tube.
Step 7:
As you get underway, periodically verify the alignment of the stone within the setting; if you carve too deeply, an excessive amount of metal will need to be manipulated, potentially obscuring too much of the stone. Employ the corner of your beeswax to lift the stone and gently place it into the tube. The upper edge of the tube should extend over the girdle (the broadest section of the stone) but not past the top surface of the stone.
Step 8:
Once you're satisfied with the placement of the stone, utilize the square pusher to gently guide the metal over the stone, alternating sides as previously mentioned, while ensuring the stone remains level after each adjustment. Proceed to smooth out any imperfections created during the setting process using a burnisher, and finish by attaching your chain and clasp.
View more related articles
Jewelry and Jade Identification Tools
Easy to Understand the Craft of Making Gold Jewelry
Exploring the Charm of Freshwater Pearls
What Casting Equipment Are Available for Jewelry Processing?


